


MCSE is back
Dupa ani in care Microsoft a luat-o pe aratura cu certificarile se pare ca s-au razgandit si s-au intors la MCSE. Detalii despre noile certificari gasiti aici:
http://www.microsoft.com/learning/en/us/certification/cert-overview.aspx
Poate ca e vremea sa fac si eu un upgrade la MCSE-ul meu de pe Windows 2000 :).
Multiple L2TP connection from a single NAT device
Tocmai am descoperit un scenariu ce initial mi-a parut asemanator cu ce se intampla atunci cand incercai mai multe conexiuni PPTP prin acelasi NAT catre o singura destinatie. Insa nu era acelasi lucru, ca doar e UDP si nu GRE.
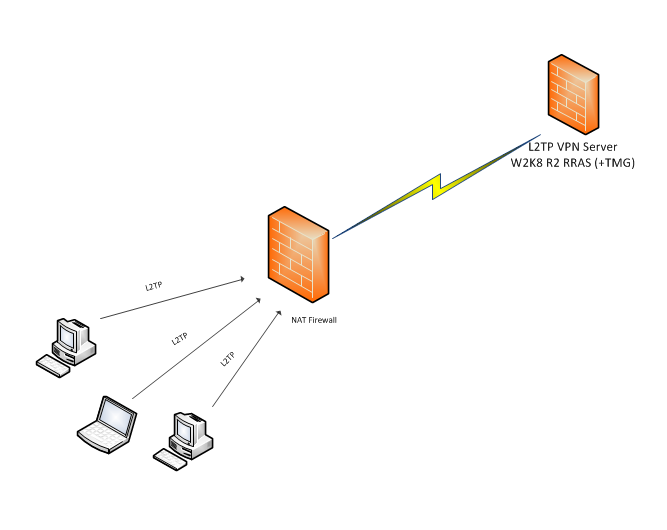
Pana la urma s-a dovedit a fi un bug, si nu pe NAT-ul prin care trec conexiunile ci pe RRAS-ul destinatie. Problema nu e nici macar de TMG in caz ca il rulati pe acel server. Puteti downloada hotfix-ul de aici:
http://support.microsoft.com/kb/2028625
Iar alte cateva informatii gasiti aici:" http://blogs.technet.com/b/isablog/archive/2010/08/04/more-than-one-l2tp-vpn-connection-from-behind-a-nat-device-fails-with-error-809-when-tmg-2010-has-been-configured-as-a-vpn-server.aspx
TMG and ICMP Redirect
Scenariul cu ICMP Redirect apare in momentul in care avem statiile setate cu default gateway ip-ul TMG-ului dar exista si alte subneturi interne ce sunt rutate printr-un alt router intern. Ceva ce seamana cu poza de mai jos:
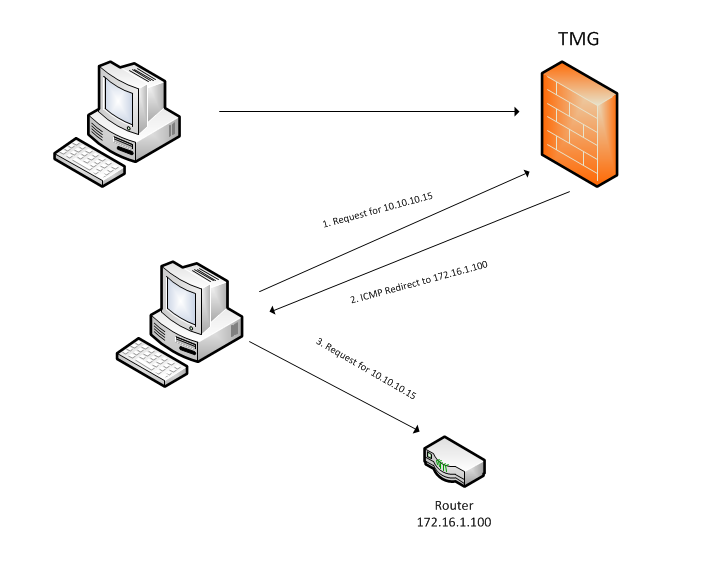
In poza vedeti ca pentru requesturile ce ar trebuie rutate prin acel router intern, TMG-ul trimite un pachet de tip ICMP redirect ce adauga o ruta statica pe statia ce a facut cererea si o redirecteaza catre acel ruter intern. Am pus postul pentru ca am gasit numeroase informatii confuze pe internet inclusiv ceva de la Microsoft cum ca TMG/ISA nu suporta trafic redirection si pornind de aici toata lumea a zis ca nu se poate. Ba se poate.
Prima data sa clarificam ce face setarea EnableICMPRedirect din registry:
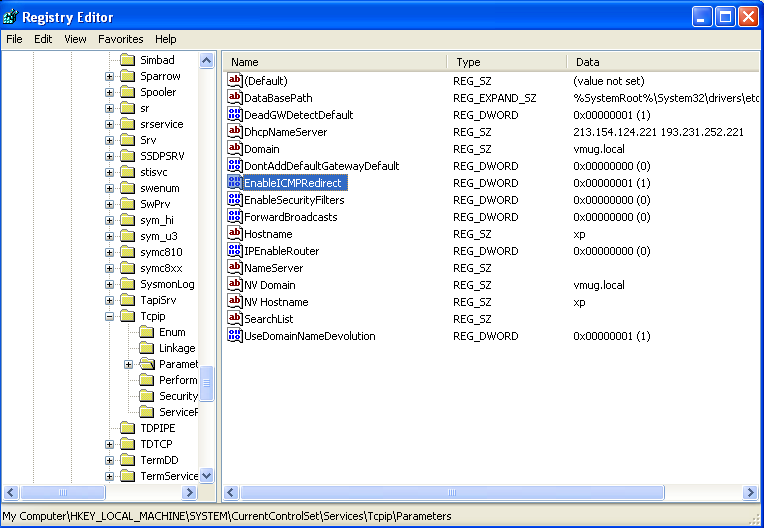
Permite statiei sa accepte noua ruta trimisa de TMG. Aceasta setare nu trebuie pusa pe TMG ci pe clienti (si e Enable by default deci nu trebuie sa faceti nimic). Dupa cum mai vedeti acolo sus mai exista si IPEnableRouter. Nu trebuie activata. Mai ales pe TMG. Daca activati asa ceva pe TMG zapaciti tot.
Pe TMG trebuie definit protocolul ICMP Redirect exact ca mai jos:
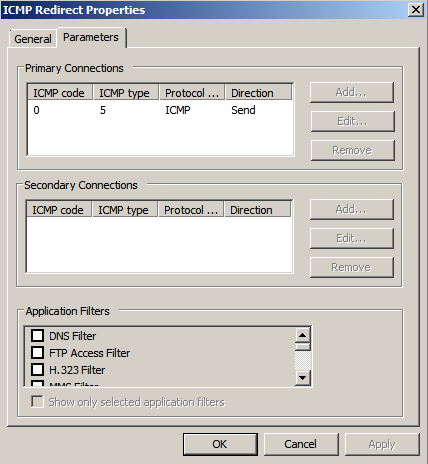
ICMP Type 5 Code 0. Nu altceva cum e scris pe net.

Iar regula, ceva in genul celei din poza de mai sus. Altfel TMG nu o sa trimita raspunsul la clienti.
Si aproape ca uitasem. RRAS trebuie sa fie activ pe TMG.
Migrating Websense rules to TMG
Am descoperit ca se poate sa migrezi regulile din Websense in TMG.
E nevoie de un mic soft dezvoltat de cei de la SecureGUARD – Web Configuration Migration Wizard:
http://www.secureguard.at/Shop/WebConfigurationWizard.aspx
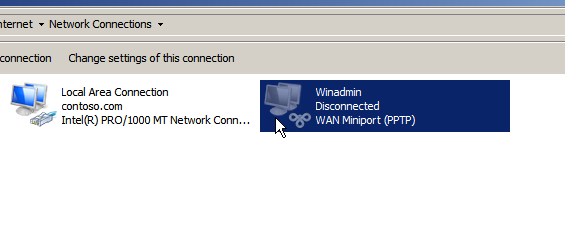
Automating the creation of VPN connection profiles
Postul vine ca raspuns la intrebarea “ce facem cand instalam o noua solutie de VPN si trebuie sa trecem pe la fiecare calculator in parte sa ii setam conexiunea VPN?”. Nu am putea sa le trimitem un fisier de configurare sau sa setam ceva via GPO?
Putem. Exista doua variante si o sa le prezint foarte sumar aici.
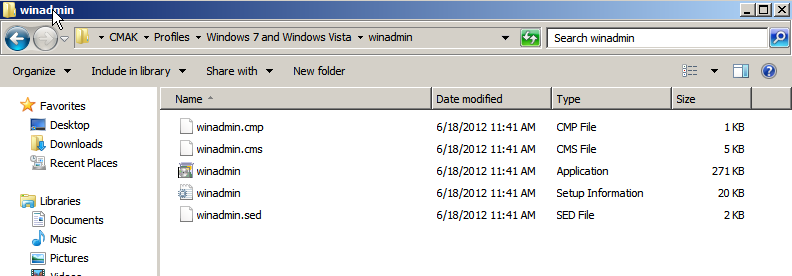
Prima si cea mai simpla este folosirea CMAK-ului aka Connection Manager Kit:
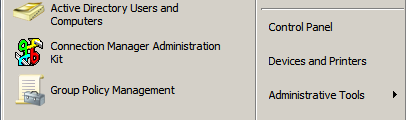
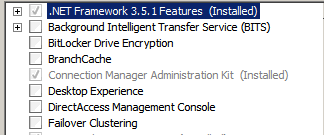
Il gasiti ca si Feature pe Windows Server,
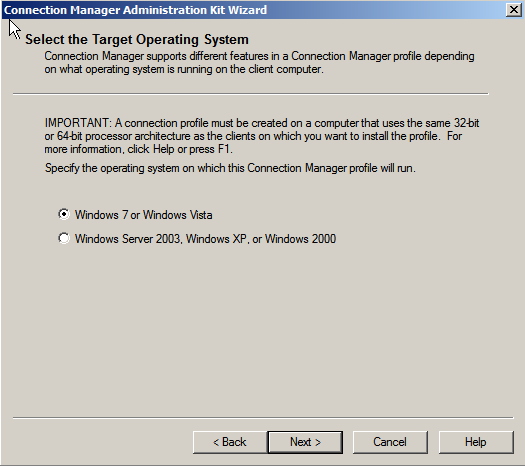
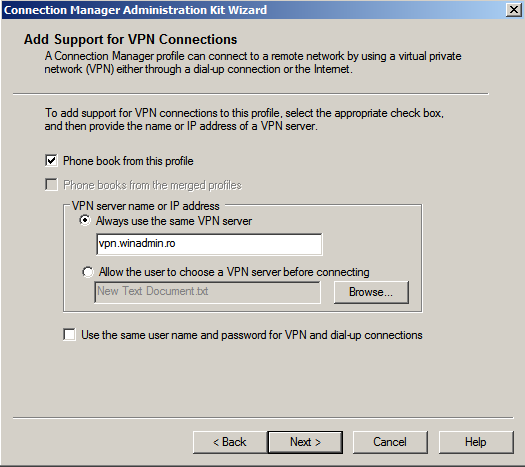
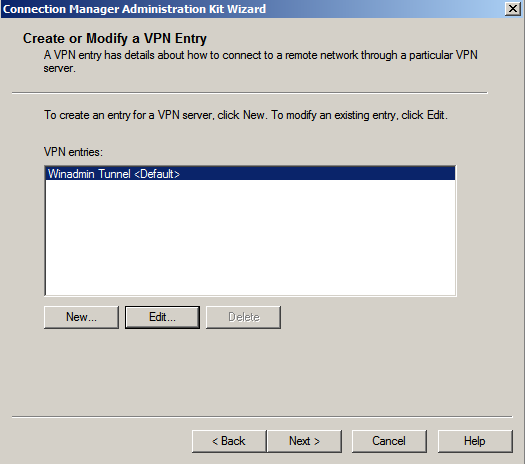
Se pot customiza destul de multe lucruri dupa cum puteti vedea.
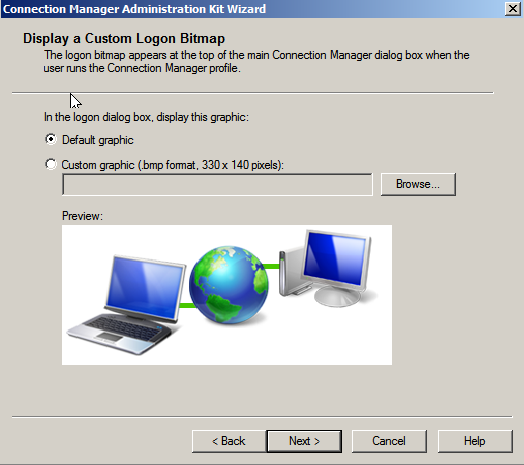
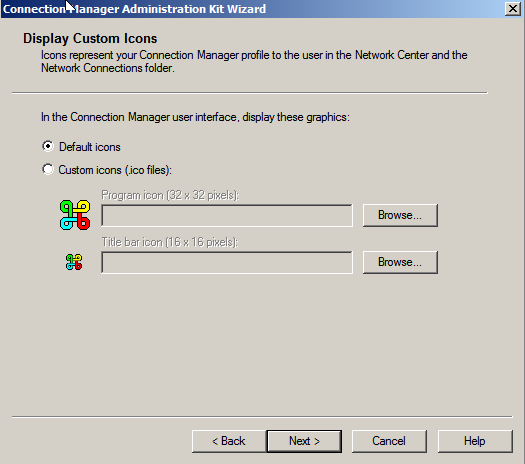
Iar la sfarsit wizard-ul va crea un executabil ce poate fi trimis userului, iar in momentul in care il va instala acesta va crea conexiuna VPN cu specificatiile date de noi.
Iar cealalta varianta, probabil mai la moda in ziua de azi ar fi via Powershell si eventual GPO:
http://technet.microsoft.com/en-us/library/ee431700(v=ws.10).aspx
http://www.microsoft.com/en-us/download/details.aspx?id=2555
In linkurile de mai sus gasiti tot ce va trebuie inclusiv exemple. Probabil nu este atat de simplu ca si cu CMAK insa e ceva mai flexibil.
Spor!
Visual Studio Express 2012 extended to desktop apps
Daca pe admini Microsoft nu-i asculta, e bine ca macar ii asculta pe dezvoltatori.
Pentru cei ce nu sunt foarte familiari cu ultimele noutati din zona Visual Studio, Microsoft anuntase ca versiunile Visual Studio Express 2012 nu o sa poata fi folosite pentru a scrie aplicatii console/desktop ci numai pentru Metro, Windows phone si Web. Daca doreai sa scrii si aplicatii de tip desktop atunci trebuia sa folosesti Visual Studio Professional.
Saptamana trecuta insa compania s-a razgandit si a anuntat ca o sa existe si versiuni ale VS Express pentru aplicatiile desktop.
Cu toate astea stau si ma intreb, cum de oare le-a venit ideea asta in primul rand? Oare atat de mare e rezistenta userilor la Metro incat se simtea nevoia sa-i forteze pe dezvoltatori?
Security Advisory 2718704 & Terminal Services
Microsoft tocmai a revocat doua certificate ce tineau de serverele responsabile de activarea licentelor de TS/RDS.
http://technet.microsoft.com/en-us/security/advisory/2718704
Pe scurt, trebuie sa va reactivati licentele inainte de a face orice alta operatiune pe serverele de TS care sa comunice cu serverele de activare.
Si ceva mai multe detalii gasiti si aici:
Forcing a Windows crash dump in Vmware ESXi
Am vazut ca subiectul din titlu e o problema pentru multi ce ruleaza Windows pe Vmware. Dar dupa ce o sa cititi acest post sper sa fie destul de simplu (excludem metodele cu debuggerul ca sunt pentru avansati).
Prima metoda e prin generarea crashului de la tastatura asa cum este descris aici: http://msdn.microsoft.com/en-us/library/windows/hardware/ff545499(v=vs.85).aspx (Minim W2K3 SP2 sau chiar si SP1 cu un hotfix)
You must ensure the following three settings before the keyboard can cause a system crash:
1.If you wish a crash dump file to be written, you must enable such dump files, choose the path and file name, and select the size of the dump file. For more information, see Enabling a Kernel-Mode Dump File.
2.With PS/2 keyboards, you must enable the keyboard-initiated crash in the registry. In the registry key HKEY_LOCAL_MACHINE\System\CurrentControlSet\Services\i8042prt\Parameters, create a value named CrashOnCtrlScroll, and set it equal to a REG_DWORD value of 0x01.
3.With USB keyboards, you must enable the keyboard-initiated crash in the registry. In the registry key HKEY_LOCAL_MACHINE\System\CurrentControlSet\Services\kbdhid\Parameters, create a value named CrashOnCtrlScroll, and set it equal to a REG_DWORD value of 0x01.
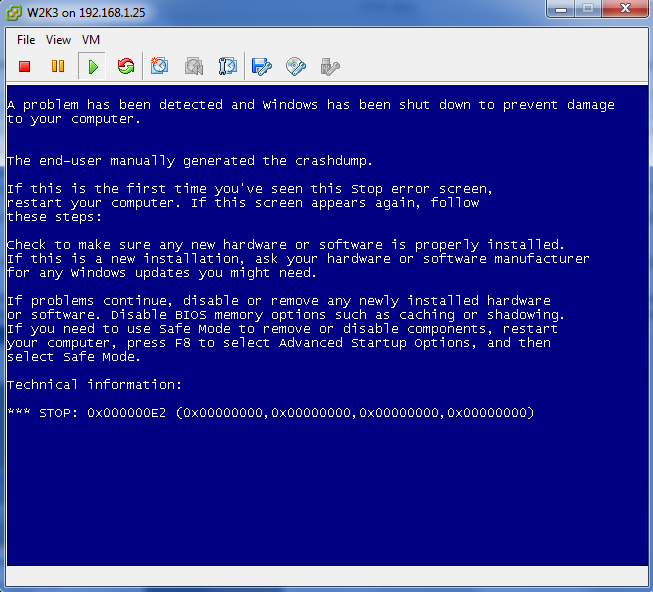
Una din problemele aparute cu aceasta metoda este ca se incearca combinatia de taste CTRL + SCROLL LOCK din RDP, sau folosind clientul Vsphere tot dintr-o sesiune RDP. Nu merge. Trebui sa va conectati direct (de pe sistemul local, fara RDP) la Vcenter sau host-ul ESXi cu Vsphere Client. Din acest moment se poate genera crash-ul la consola masinii virtuale. Tipul tastaturii este PS2.
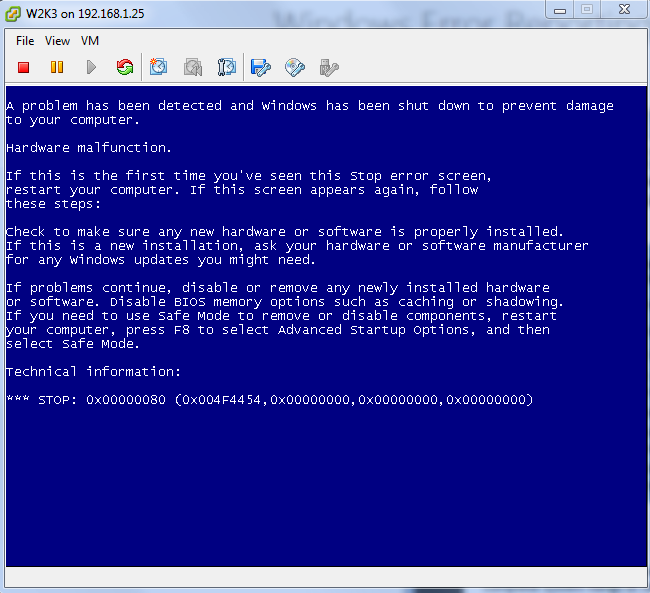
In acest moment trebuie sa tineti apasata tasta CTRL din dreapta si sa apasati de doua ori SCROLL LOCK. Rezultatul este mai jos:
Bun, si acum sa vedem inca o metoda care poate fi folosita atunci cand varianta de mai sus nu functioneaza. Este metoda NMI (Non-Maskable Interrupt) si o gasiti descrisa in acest KB: http://support.microsoft.com/kb/927069
Pe scurt, trebuie activat dump-ul si adaugata in registri cheia HKEY_LOCAL_MACHINE\SYSTEM\CurrentControlSet\Control\CrashControl\NMICrashDump cu valoarea 1. Dar ca sa nu imi scape nimic pun mai jos toti pasii din KB:
1.Set up the page file to generate a complete memory dump file. For more information, click the following article number to view the article in the Microsoft Knowledge Base:
108393 The /maxmem switch in the Windows Boot.ini file
2.Right-click My Computer, and then click Properties.
3.Click the Advanced tab.
4.Under Startup and Recovery, click Settings.
5.Make sure that Kernel memory dump or Complete memory dump is selected under Writing Debugging Information.
6.You can change the location of the memory dump file to a different local partition if you do not have sufficient room on the partition where the operating system is installed. For more information, click the following article number to view the article in the Microsoft Knowledge Base:
886429 What to consider when you configure a new location for memory dump files in Windows Server 2003
For more information, click the following article number to view the article in the Microsoft Knowledge Base:
885117 "Kernel Memory Dump" is displayed in Startup and Recovery, but a complete memory dump is performed in Windows 2000 or in Windows Server 2003
7.In Registry Editor, locate the following registry subkey:
HKEY_LOCAL_MACHINE\SYSTEM\CurrentControlSet\Control\CrashControl
8.Right-click CrashControl, point to New, and then click DWORD Value.
9.Type NMICrashDump, and then press ENTER.
10.Right-click NMICrashDump, and then click Modify.
11. In the Value data box, type 1, and then click OK.
12.Restart the computer.
13. Hardware vendors, such as HP, IBM, and Dell, may provide an Automatic System Recovery (ASR) feature. You should disable this feature during troubleshooting. For example, if HP and Compaq’s ASR feature is enabled in the BIOS, disable this feature while you are troubleshooting to generate a complete memory.dmp file. For the exact steps, contact your hardware vendor.
14.Enable the NMI switch in the BIOS or by using the Integrated Lights Out (iLO) Web interface.
Note For the exact steps, see the BIOS reference manual or contact your hardware vendor.
15. Test this method on the server by using the NMI switch to generate a dump file. You will see a STOP 0x00000080 hardware malfunction.
16.Wait for the problem to recur.
Dar cum in masina virtuala nu avem buton de NMI, ce facem? Vmware are propria metoda de a genera un NMI si iata ce trebuie sa faceti
1. Deschideti un SSH pe host-ul cu masina virtuala.
2. Rulati esxcli vm process list

3. Rulati urmatoarea comanda: /usr/lib/vmware/bin/vmdumper <worldid> nmi. Inlocuiti <worldid> cu world id-ul obtinut in pasul 2.

V-am mai spus, mai exista si varianta cu Live Kernel Debugger dar cred ca metodele de mai sus sunt suficiente pentru un admin. Mai mult de atat parca nu mai e treaba noastra ![]() .
.
ForceCopyAclwithFile pe Windows 2008
Ca sa nu va mai chinuiti va spun eu ca nu merge pe Windows 2008/R2. Nu-i mare bai ca exista si alte metode insa era mai comod pentru puturosi.
Si daca nu stiti despre ce vorbesc uite extrasul din KB310316:
You can modify how Windows Explorer handles permissions when objects are copied or moved to another NTFS volume. When you copy or move an object to another volume, the object inherits the permissions of its new folder. However, if you want to modify this behavior to preserve the original permissions, modify the registry as follows.
Click Start, click Run, type regedit in the Open box, and then press ENTER.
Locate and then click the following registry key:
HKEY_CURRENT_USER\SOFTWARE\Microsoft\Windows\CurrentVersion\Policies\Explorer
On the Edit menu, click Add Value, and then add the following registry value:
Value name: ForceCopyAclwithFile
Data type: DWORD
Value data: 1
Exit Registry Editor.
You can modify how Windows Explorer handles permissions when objects are moved in the same NTFS volume. As mentioned, when an object is moved within the same volume, the object preserves its permissions by default. However, if you want to modify this behavior so that the object inherits the permissions from the parent folder, modify the registry as follows:
Click Start, click Run, type regedit, and then press ENTER.
Locate and then click the following registry subkey:
HKEY_LOCAL_MACHINE\SOFTWARE\Microsoft\Windows\CurrentVersion\Explorer
On the Edit menu, click Add Value, and then add the following registry value:
Value name: MoveSecurityAttributes
Data type: DWORD
Value data: 0
Exit Registry Editor.
Make sure that the user account that is used to move the object has the Change Permissions permission set. If the permission is not set, grant the Change Permissions permission to the user account.
Windows 8 RC, Windows Server 2012 RC, Visual Studio 2012 RC, .Net 4.5 RC released.
In caz ca nu ati aflat inca, Windows 8 RC poate fi downloadat deja. De fapt nu ii mai zice RC ci Release Preview.
http://windows.microsoft.com/en-US/windows-8/release-preview
http://blogs.msdn.com/b/b8/archive/2012/05/31/delivering-the-windows-8-release-preview.aspx
Si alte produse …